Last time I took apart a saddle with a flex tree, I found a lot more going on with it than flexion. This time I have another flex tree trail saddle, from a different company. Before I get into it, a quick review of what I’m looking for.
These are the two basic principles I follow:
The safety of the horse and of the rider is equally important
The comfort of the horse and of the rider is equally important
You may be thinking that those are pretty obvious. So what’s that mean out here in the real world?
Those translate into a basic checklist when I assess a saddle:
Is this thing going to stay attached to the horse if things get western? (Is everything securely put together?)
Will it sore the horse? (Will the way it fits the horse make things get western?)
Will it sore the rider? (Will spending time in the saddle hurt as much as getting bucked off?)
I expect a saddle to pass all 3 of those questions to be considered a safe, serviceable piece of equipment. It’s not too much to ask that no one hurts after a ride, is it? Everything besides that is down to preference and intended use.
With all that in mind, let’s have a look at another manufactured saddle I have sitting around and see how it does.
The saddle strings have seen better days.
Trail Saddle
17″ 2005 Rocking HR Saddle
$850 new
150 hours of use
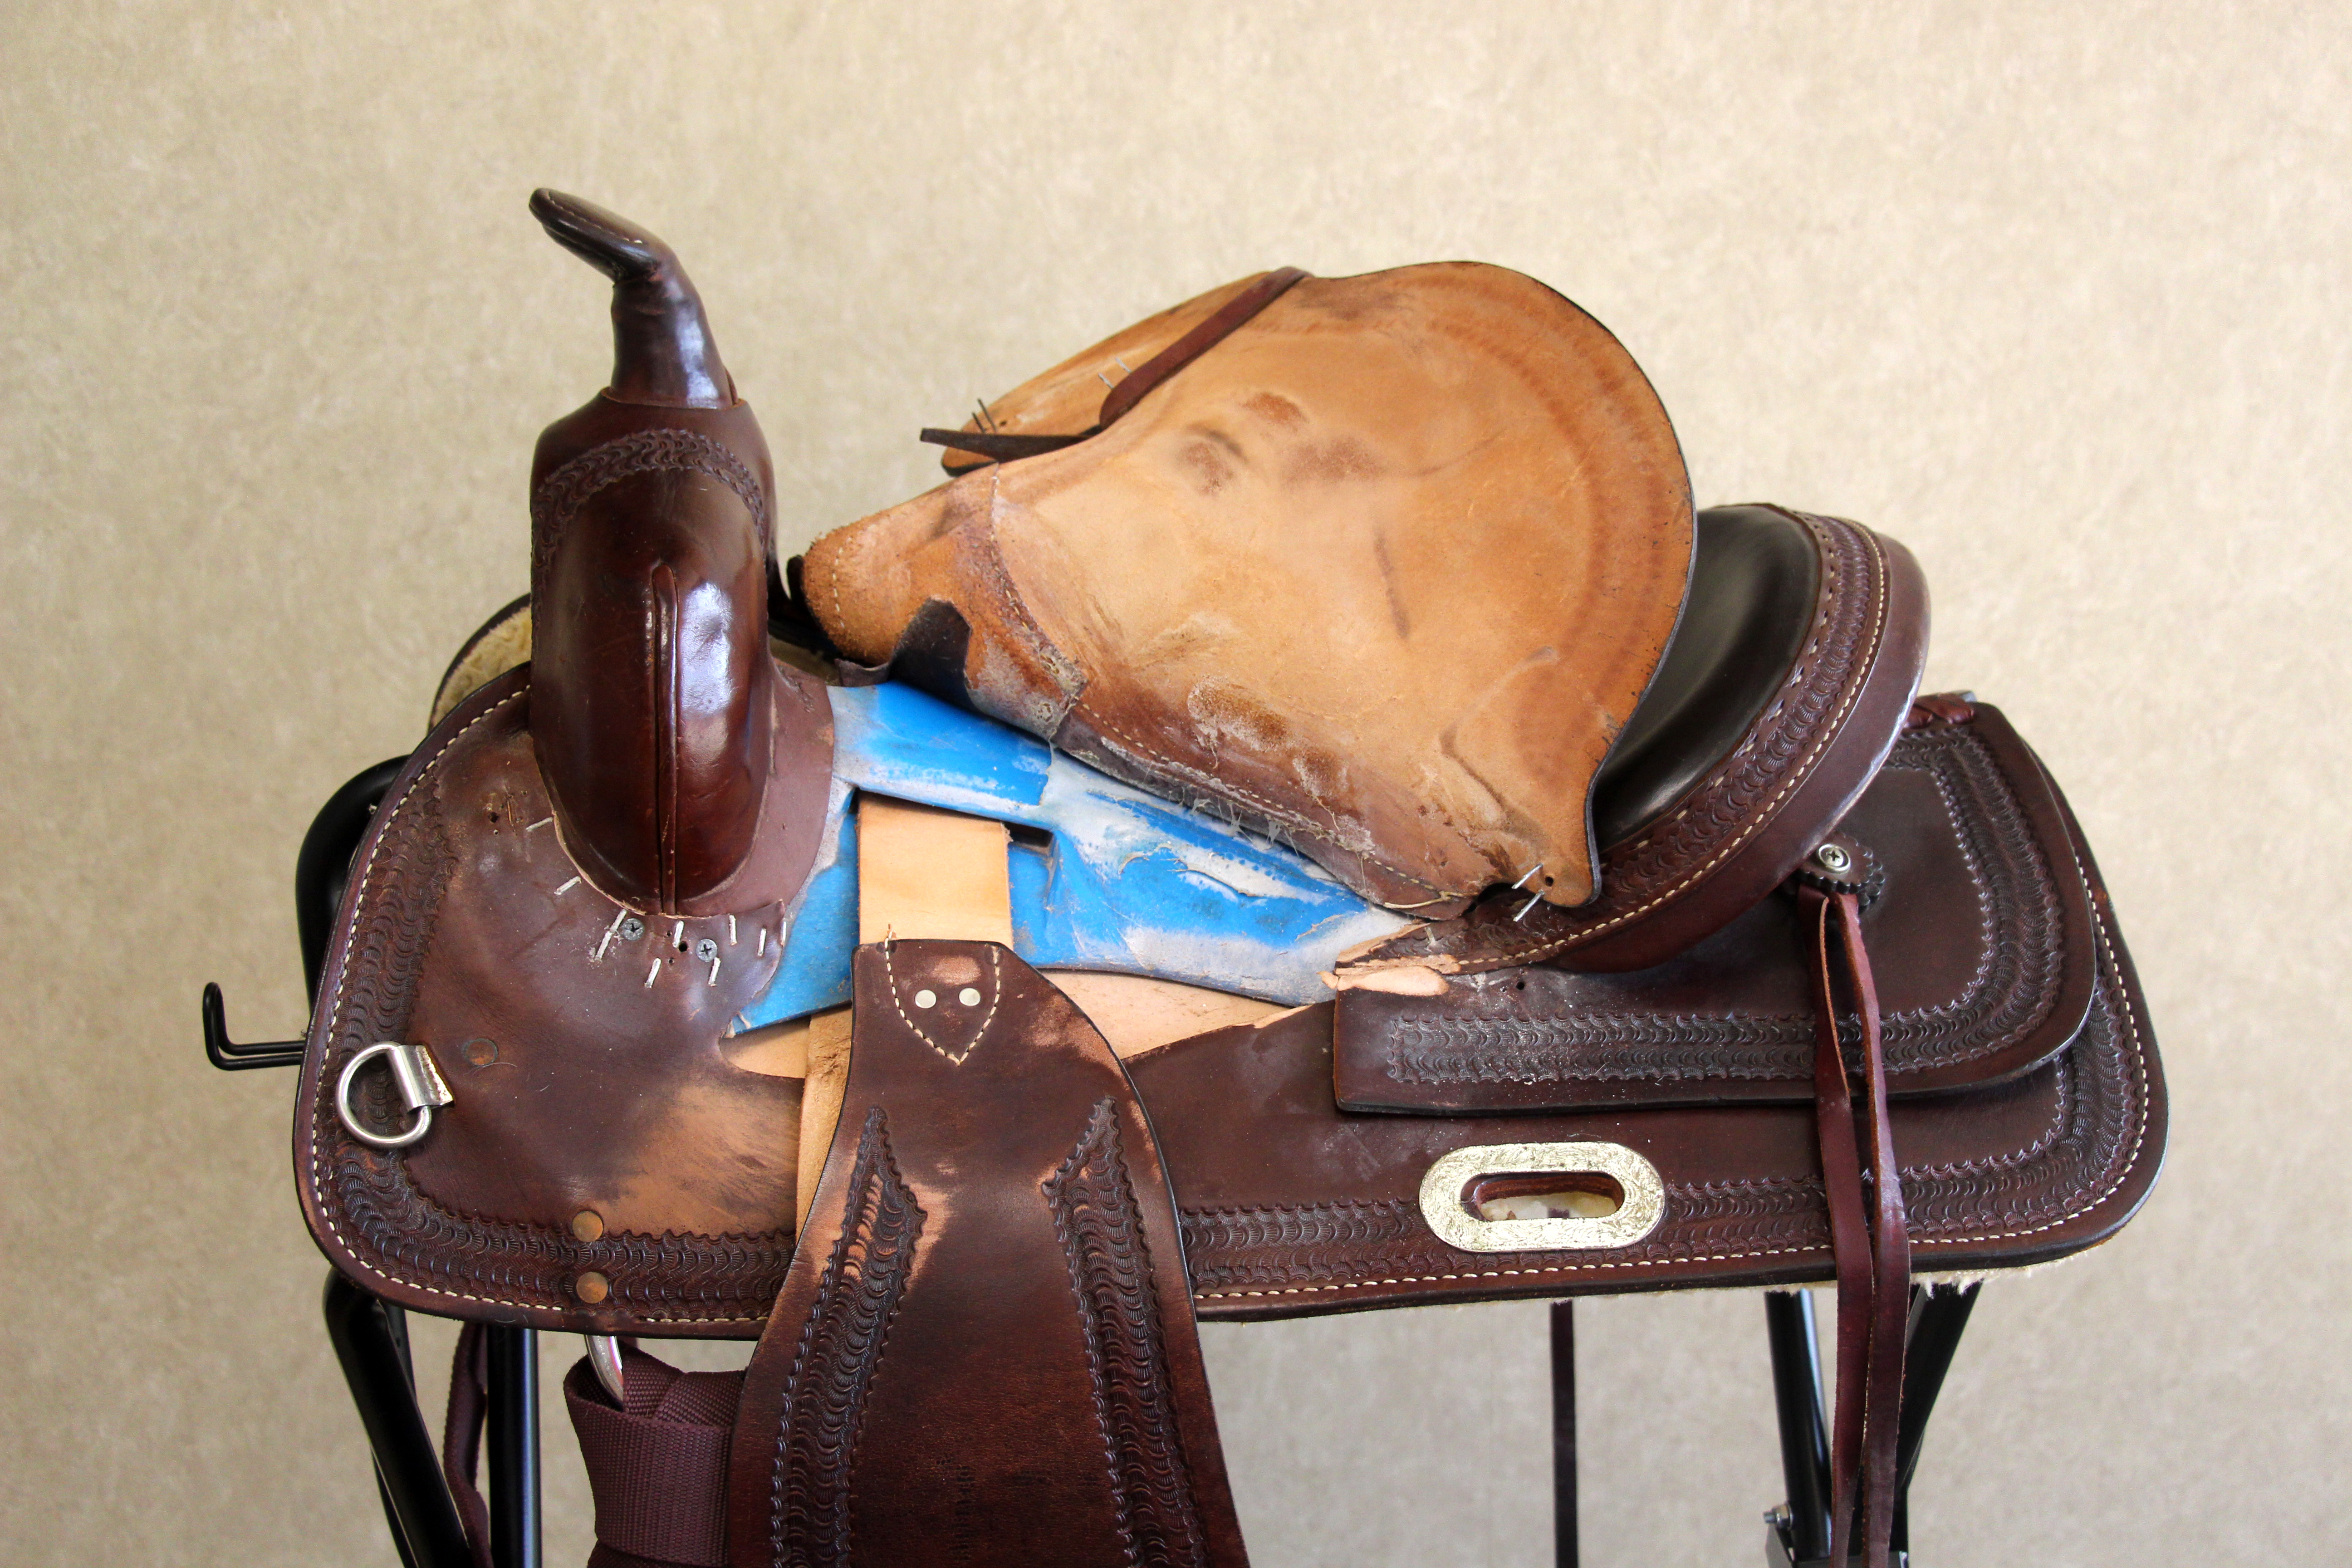
It’s marked “Rocking HR” from Frisco, Texas. It’s also marked “Custom Made,” in the sense of conforming to a saddle shop’s inventory order. The tree, advertised as being a “flex tree” type deal, is blue plastic.
This is a saddle I know very well– I used it for years, but there were vague fit issues. In fact, it eventually led to my interest in saddle fit and saddle building. I’ve never taken it completely apart, so I’m looking forward to seeing what’s under the hood.
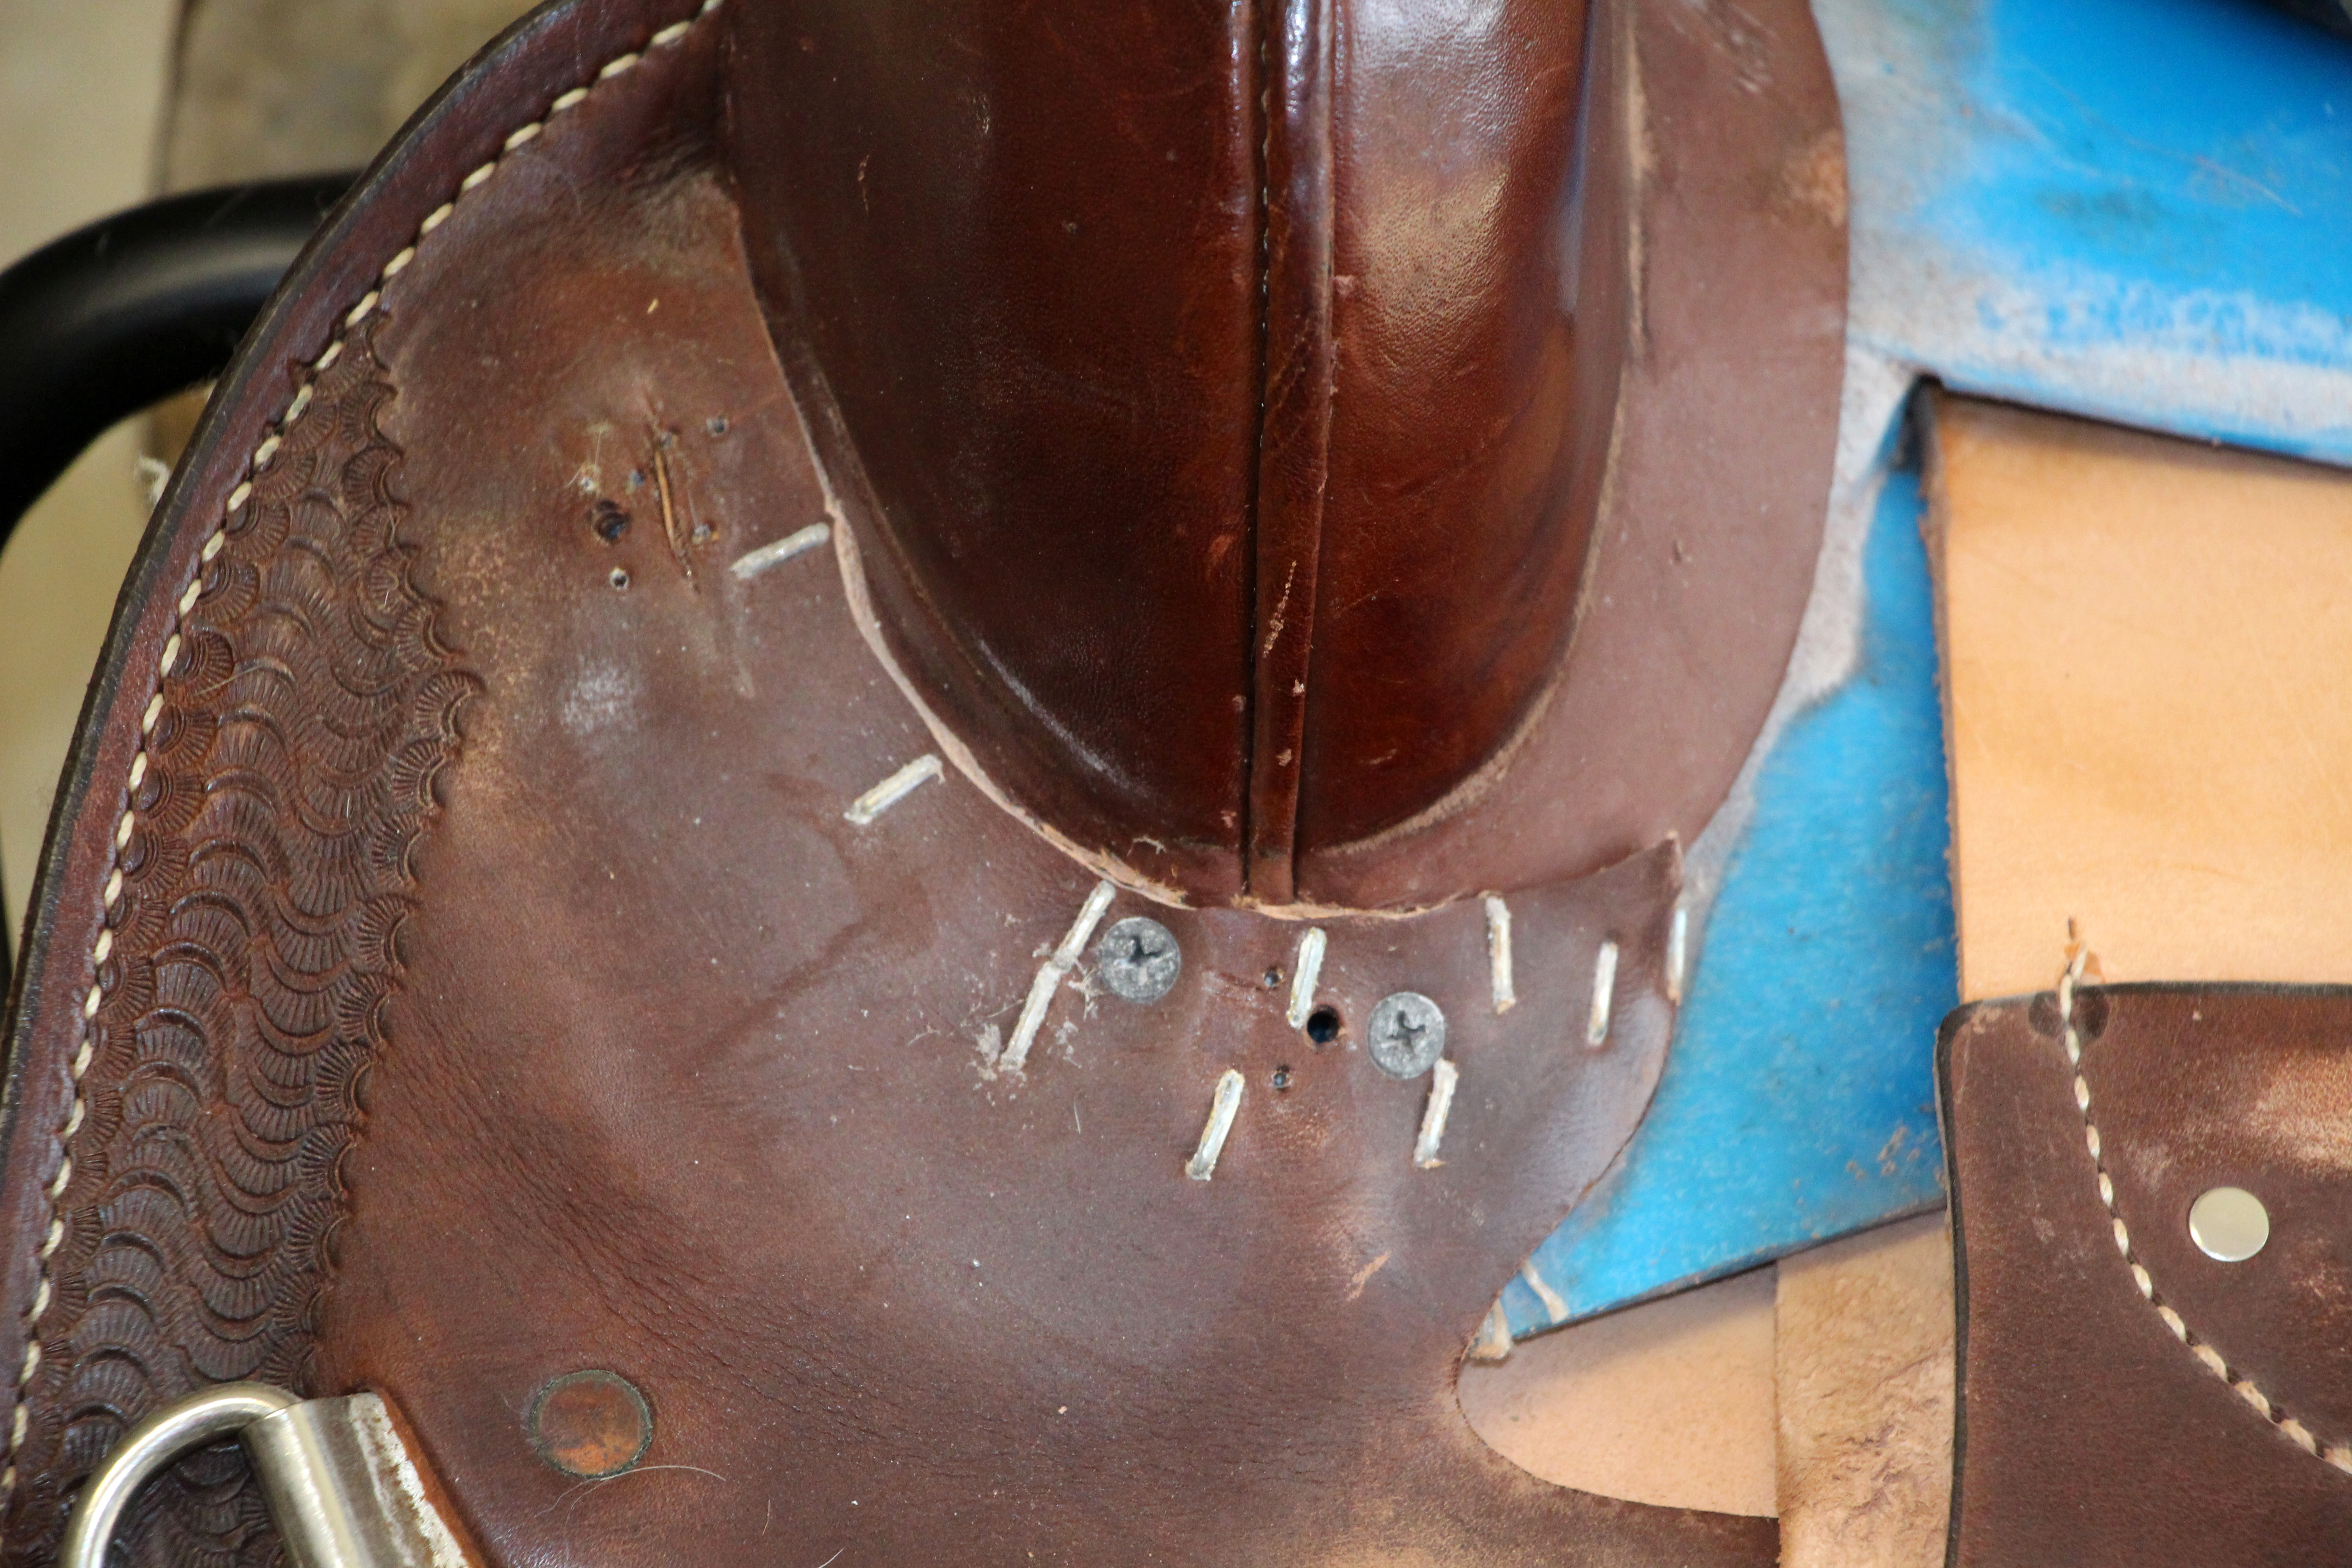
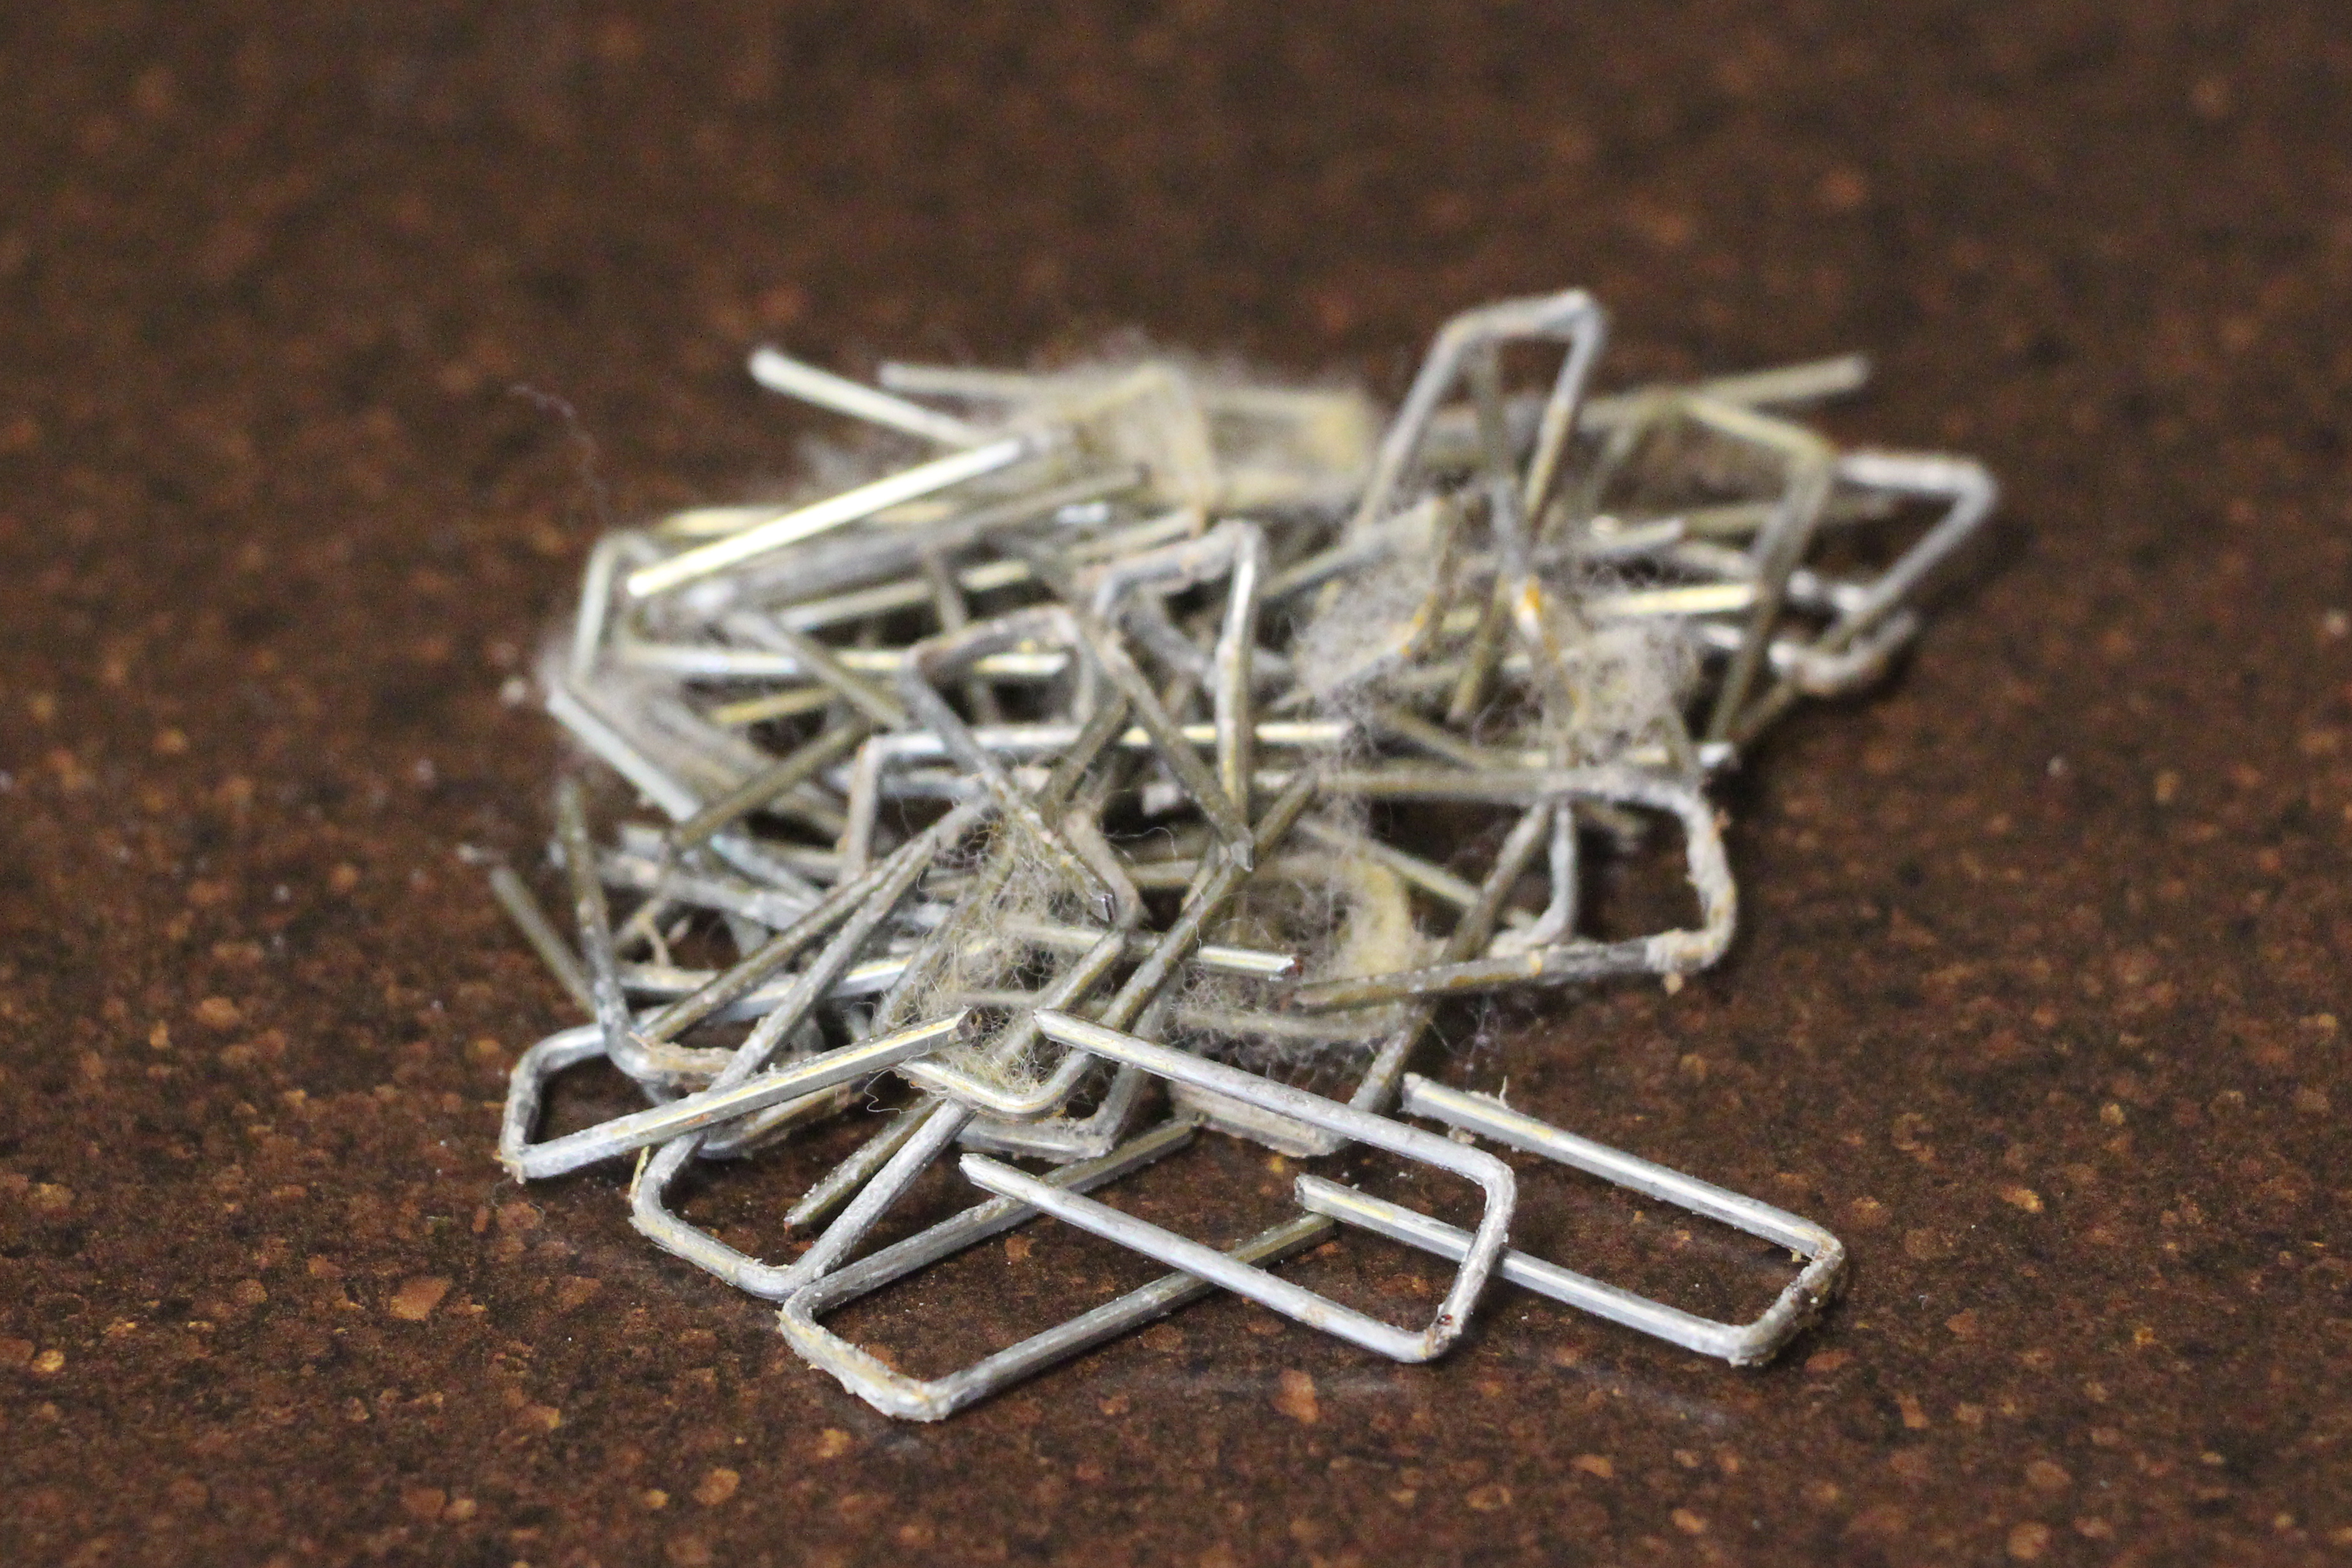
It was used quite a bit, so there is wear showing. The staples on the underside of the gullet have begun to wiggle out of the plastic tree, creating an uncomfortable handhold.
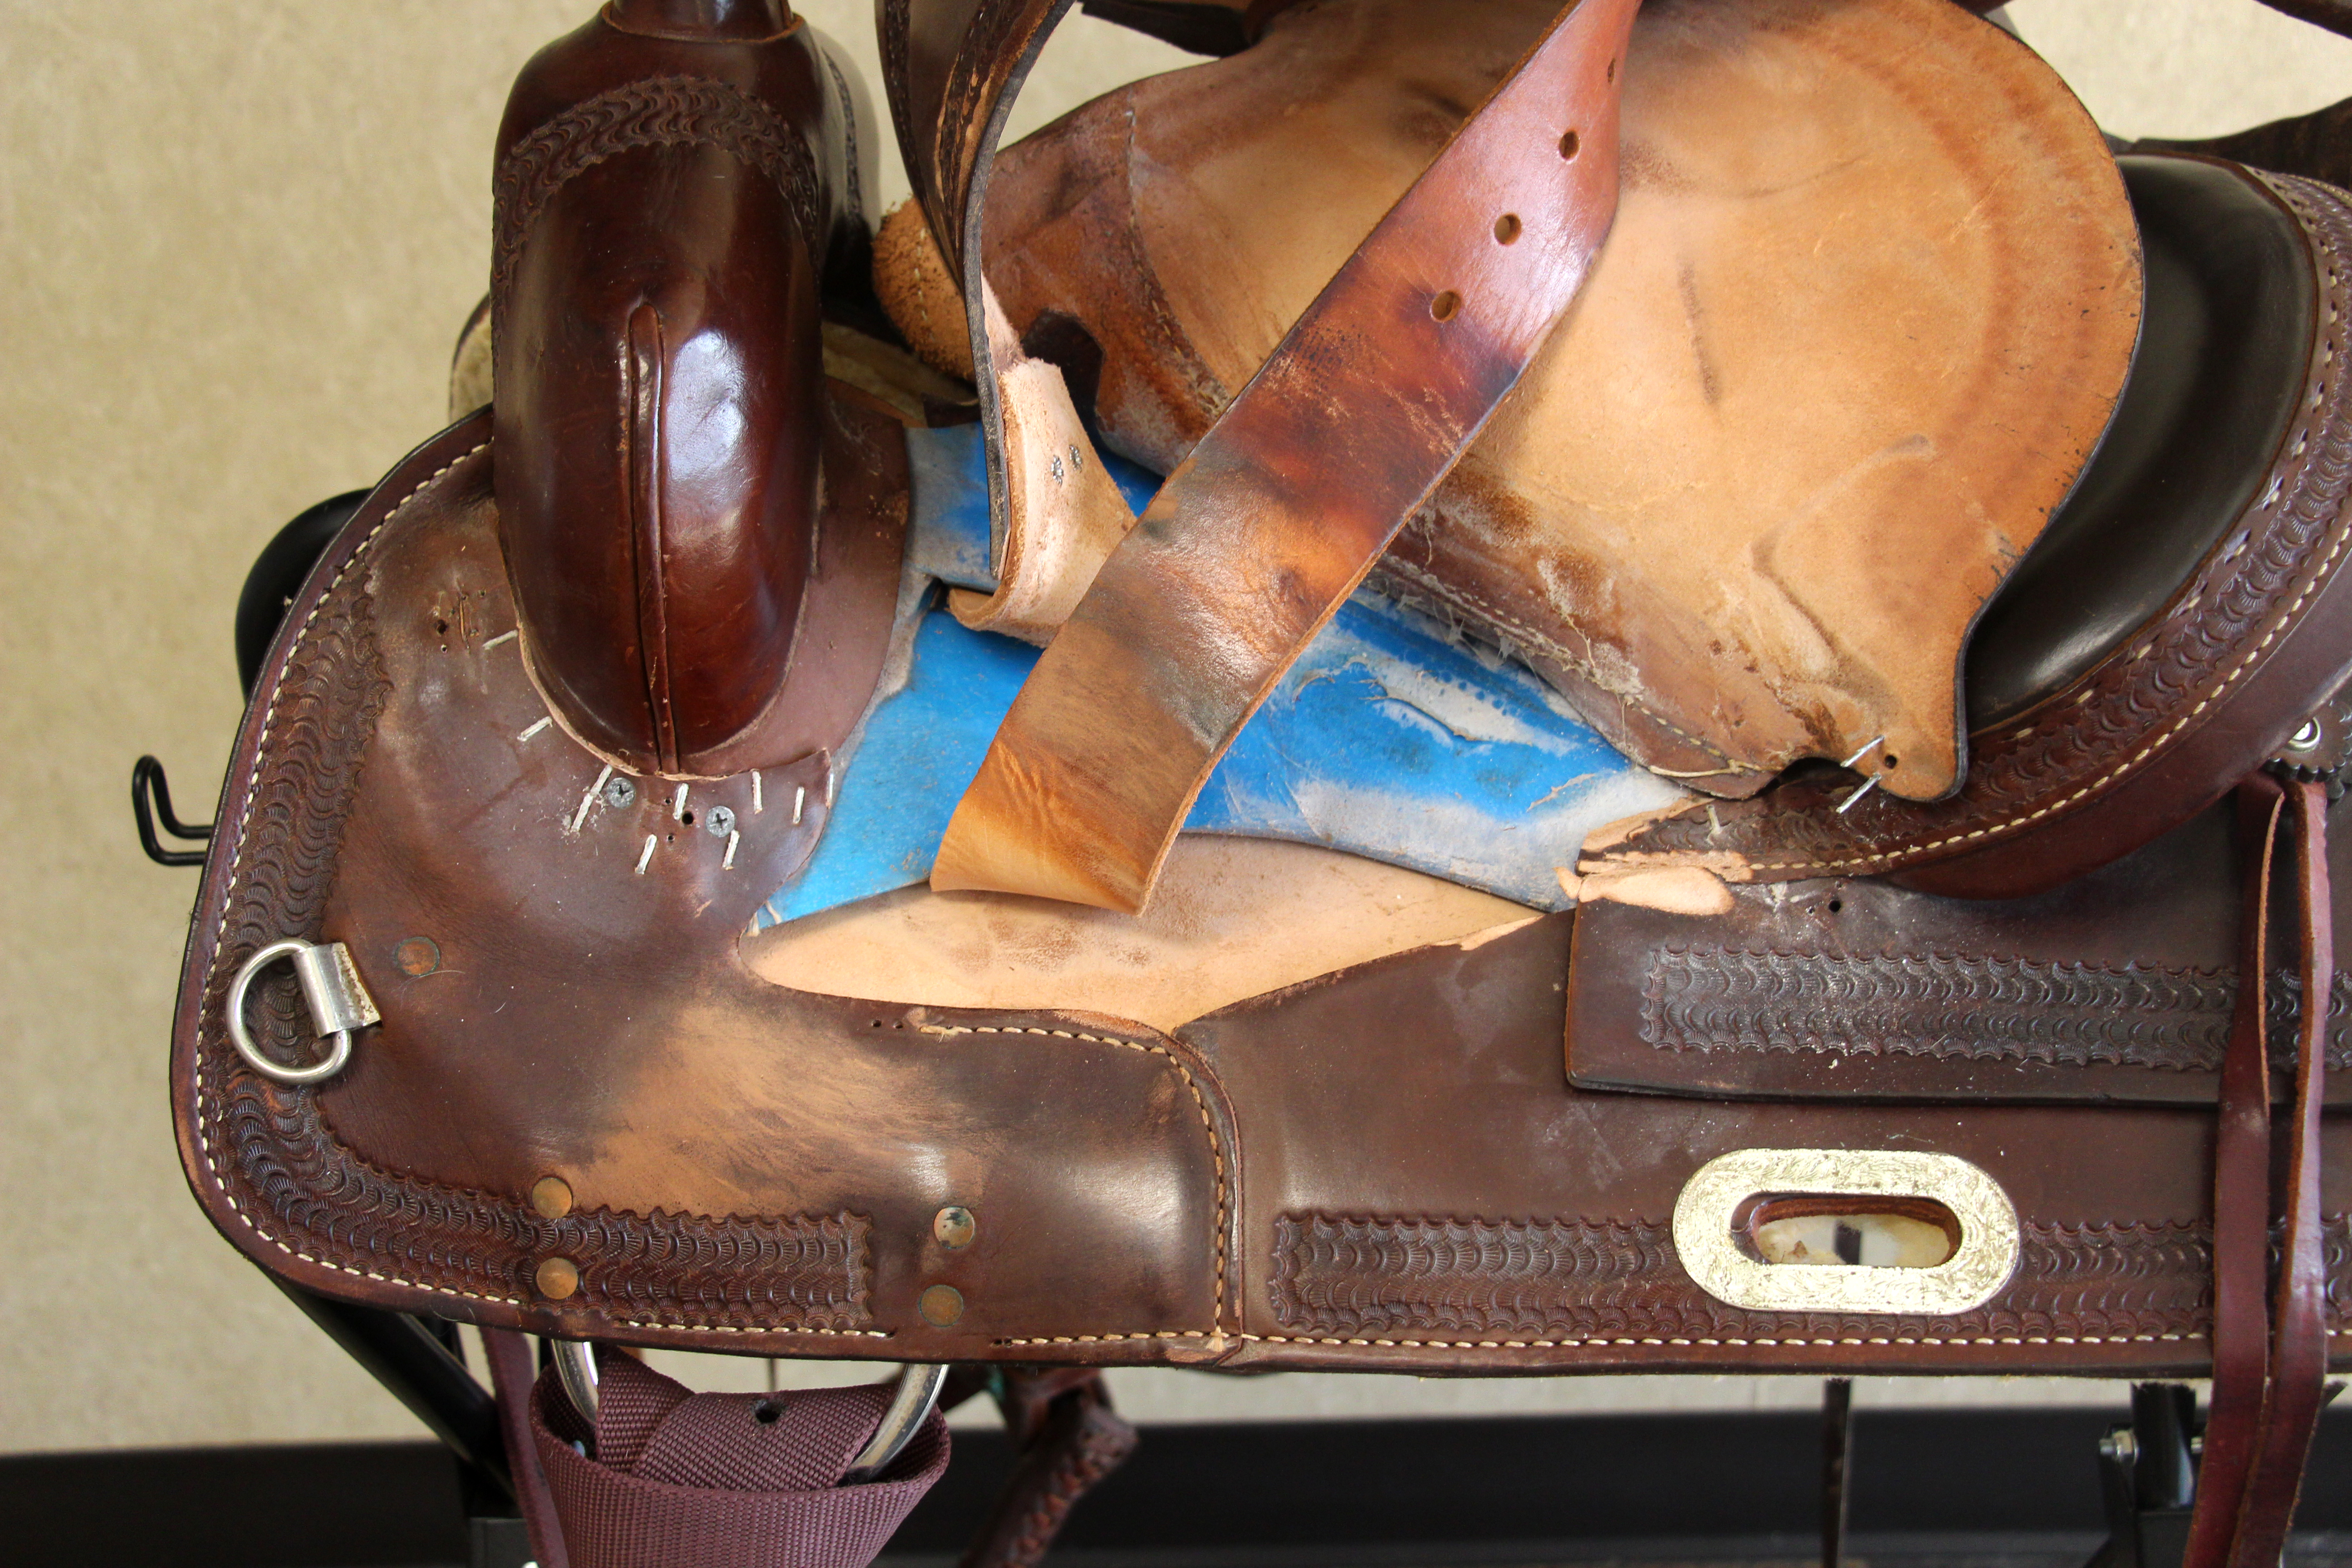
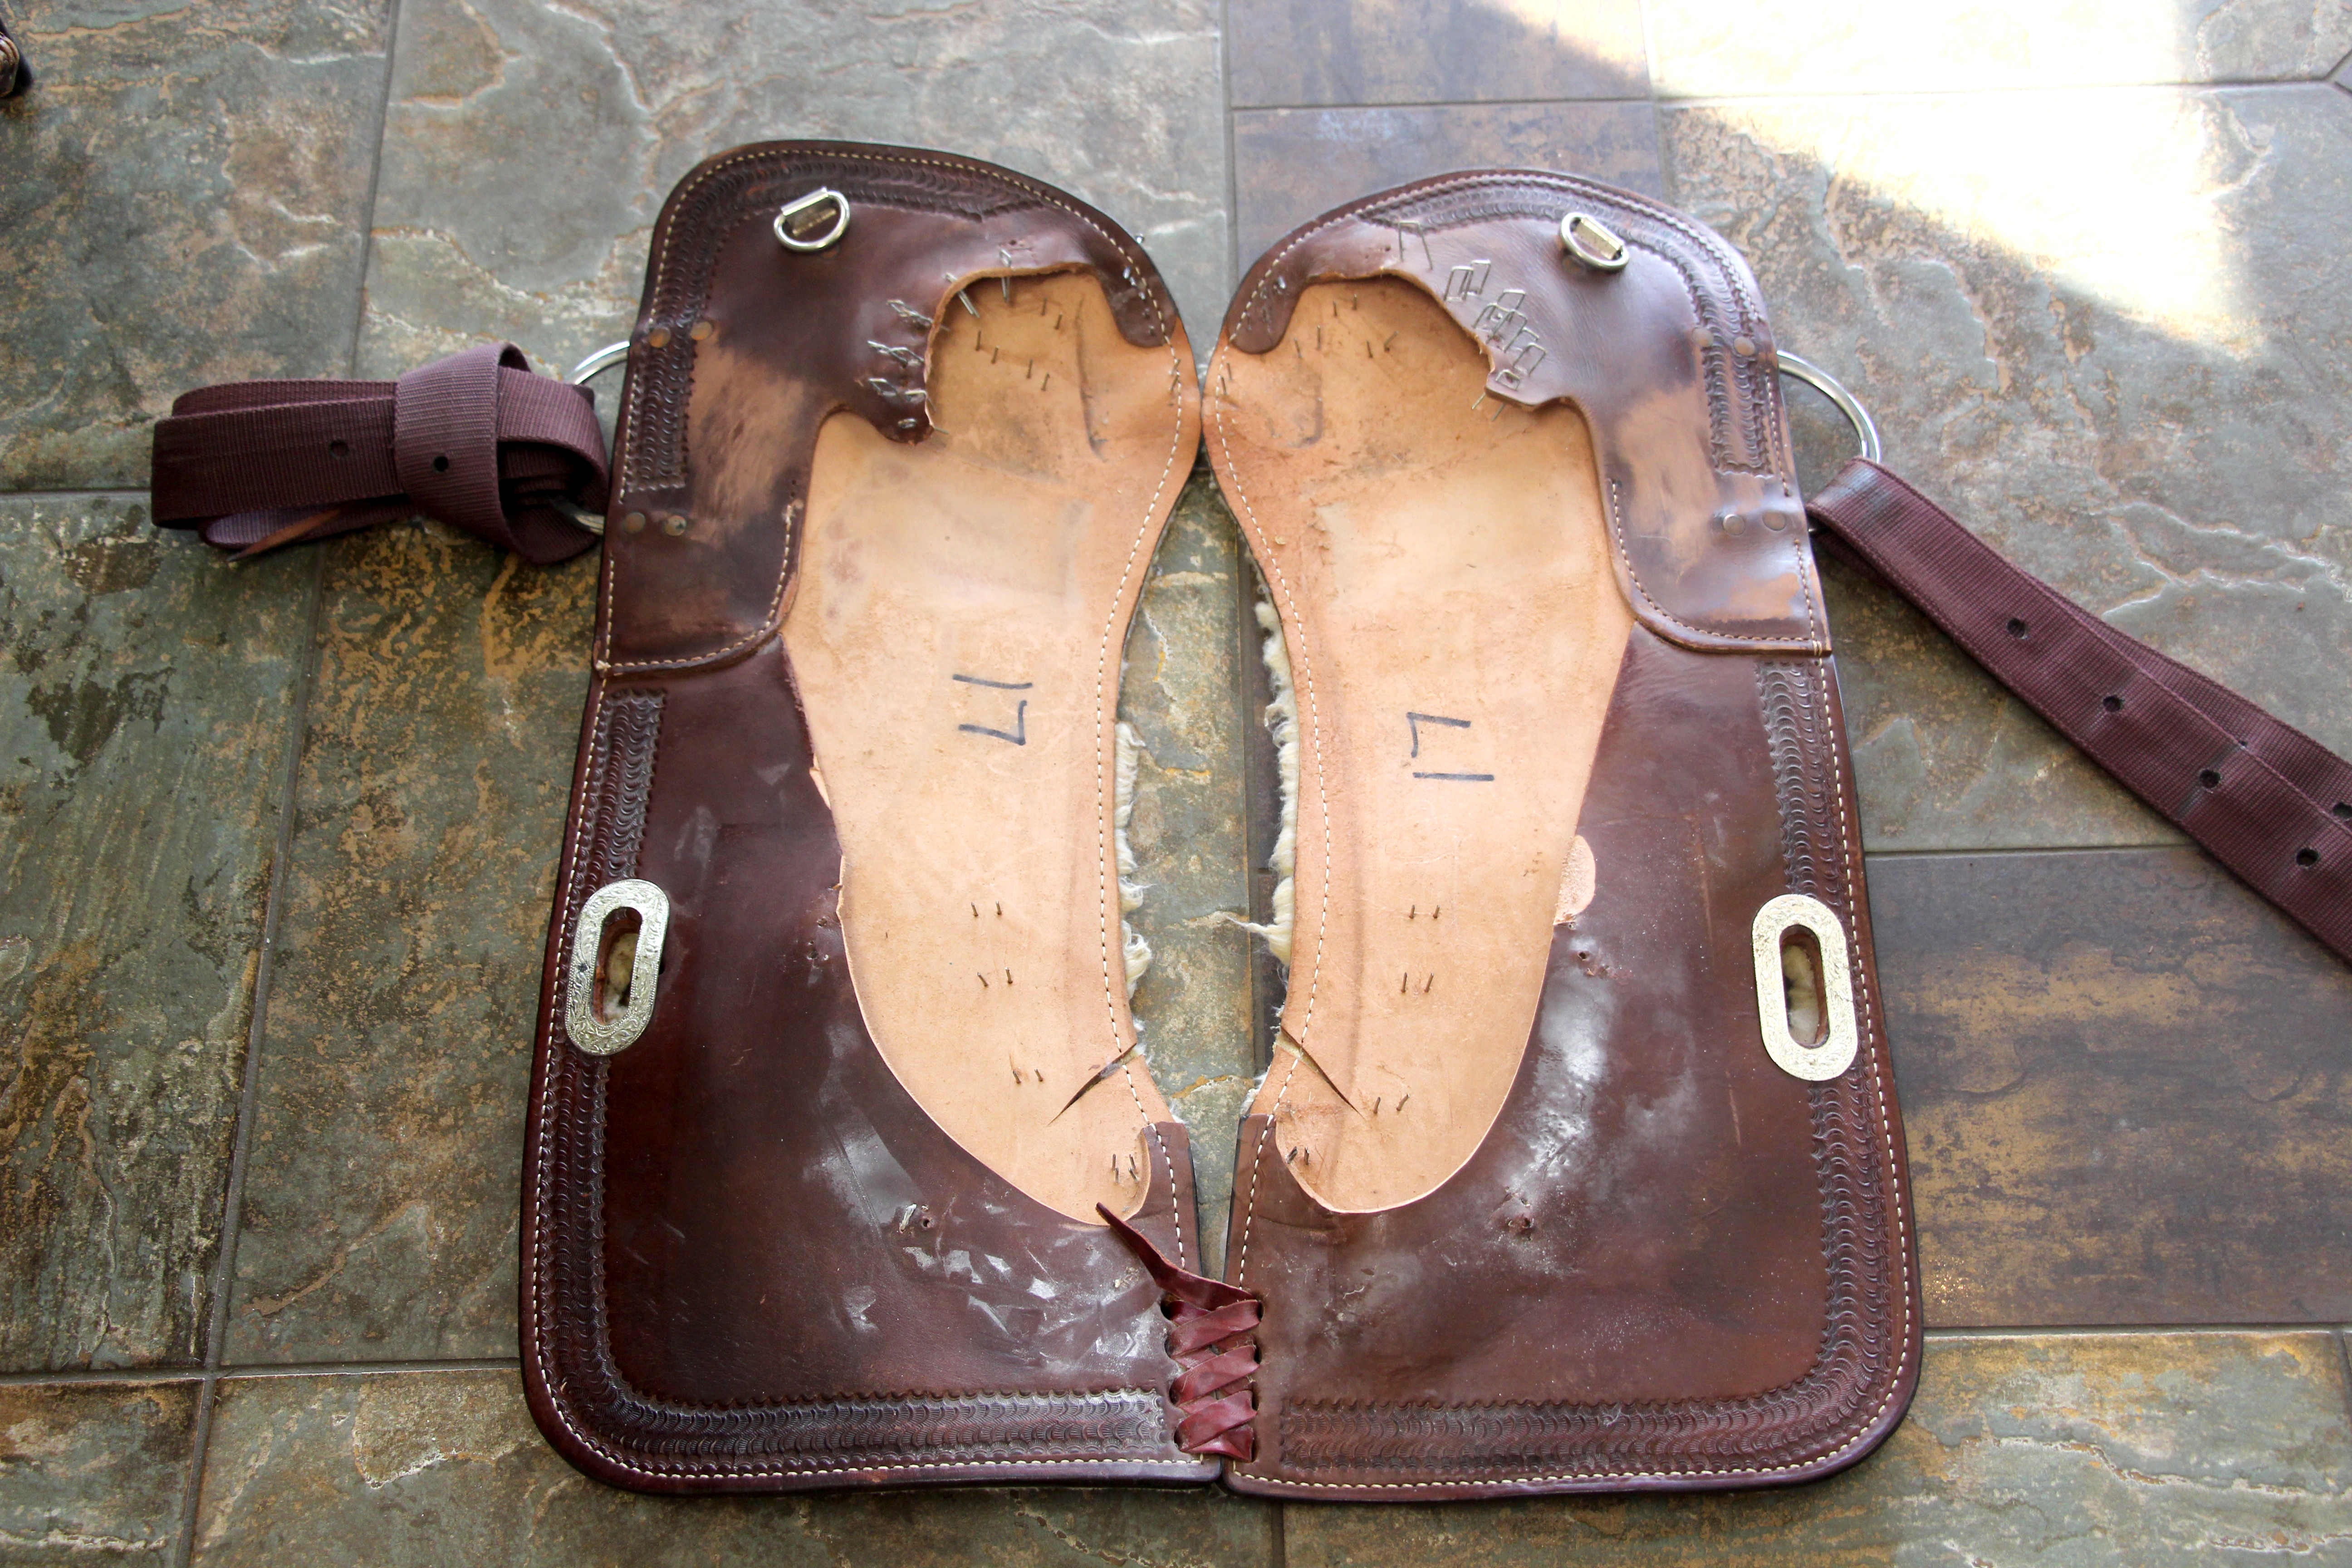
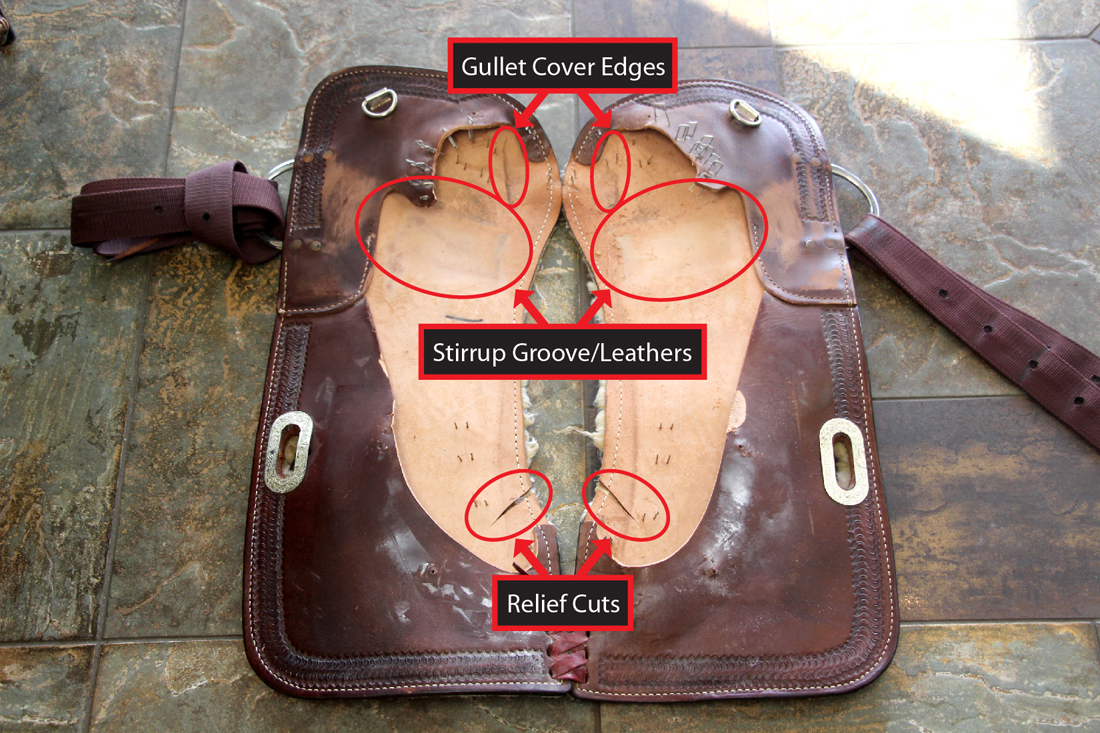
Seat lifted.
Neoprene serves as the padding. The leather edges inside are only somewhat shaved down, creating miserable pressure points under the rider’s seat.
The stirrup leather ends at the fender rivets.
The stirrup leathers are adequate, although wearing thin here. Instead of running all the way through the stirrup, one end rivets to the top of the fender, turning it into a load bearing part instead of a passive one.This saves material at the cost of longevity. There is some wear on the leather from the rough cut off end. Close inspection reveals fine cracks in the outer varnish from stretching. From experience I can say they are stiff, leading to knee pain. This is partly because the leather is varnished, so it resists oils that would otherwise supple it up.
Seam between front skirt piece and rear skirt piece.
The rigging is a ⅞ in-skirt. 4 screws hold it under the swell (2 go through the seat, already removed in this photo), plus a long nail inside the gullet. The skirts form a pocket around the back of the bars, further securing the assembly. Like the last saddle I deconstructed, the front rigging section is sewn to the rear section. The scuffing shows that the seam is in a high wear area. It’s also thinned for a smoother surface– not ideal for such a crucial attachment.
Rigging screws.
The multitude of staples debatably strengthen the rigging… but the real reason they’re there is to quickly shape the leather to the tree. It’s only roughly cut to fit, so without the staples there would be big gaps along the edge.
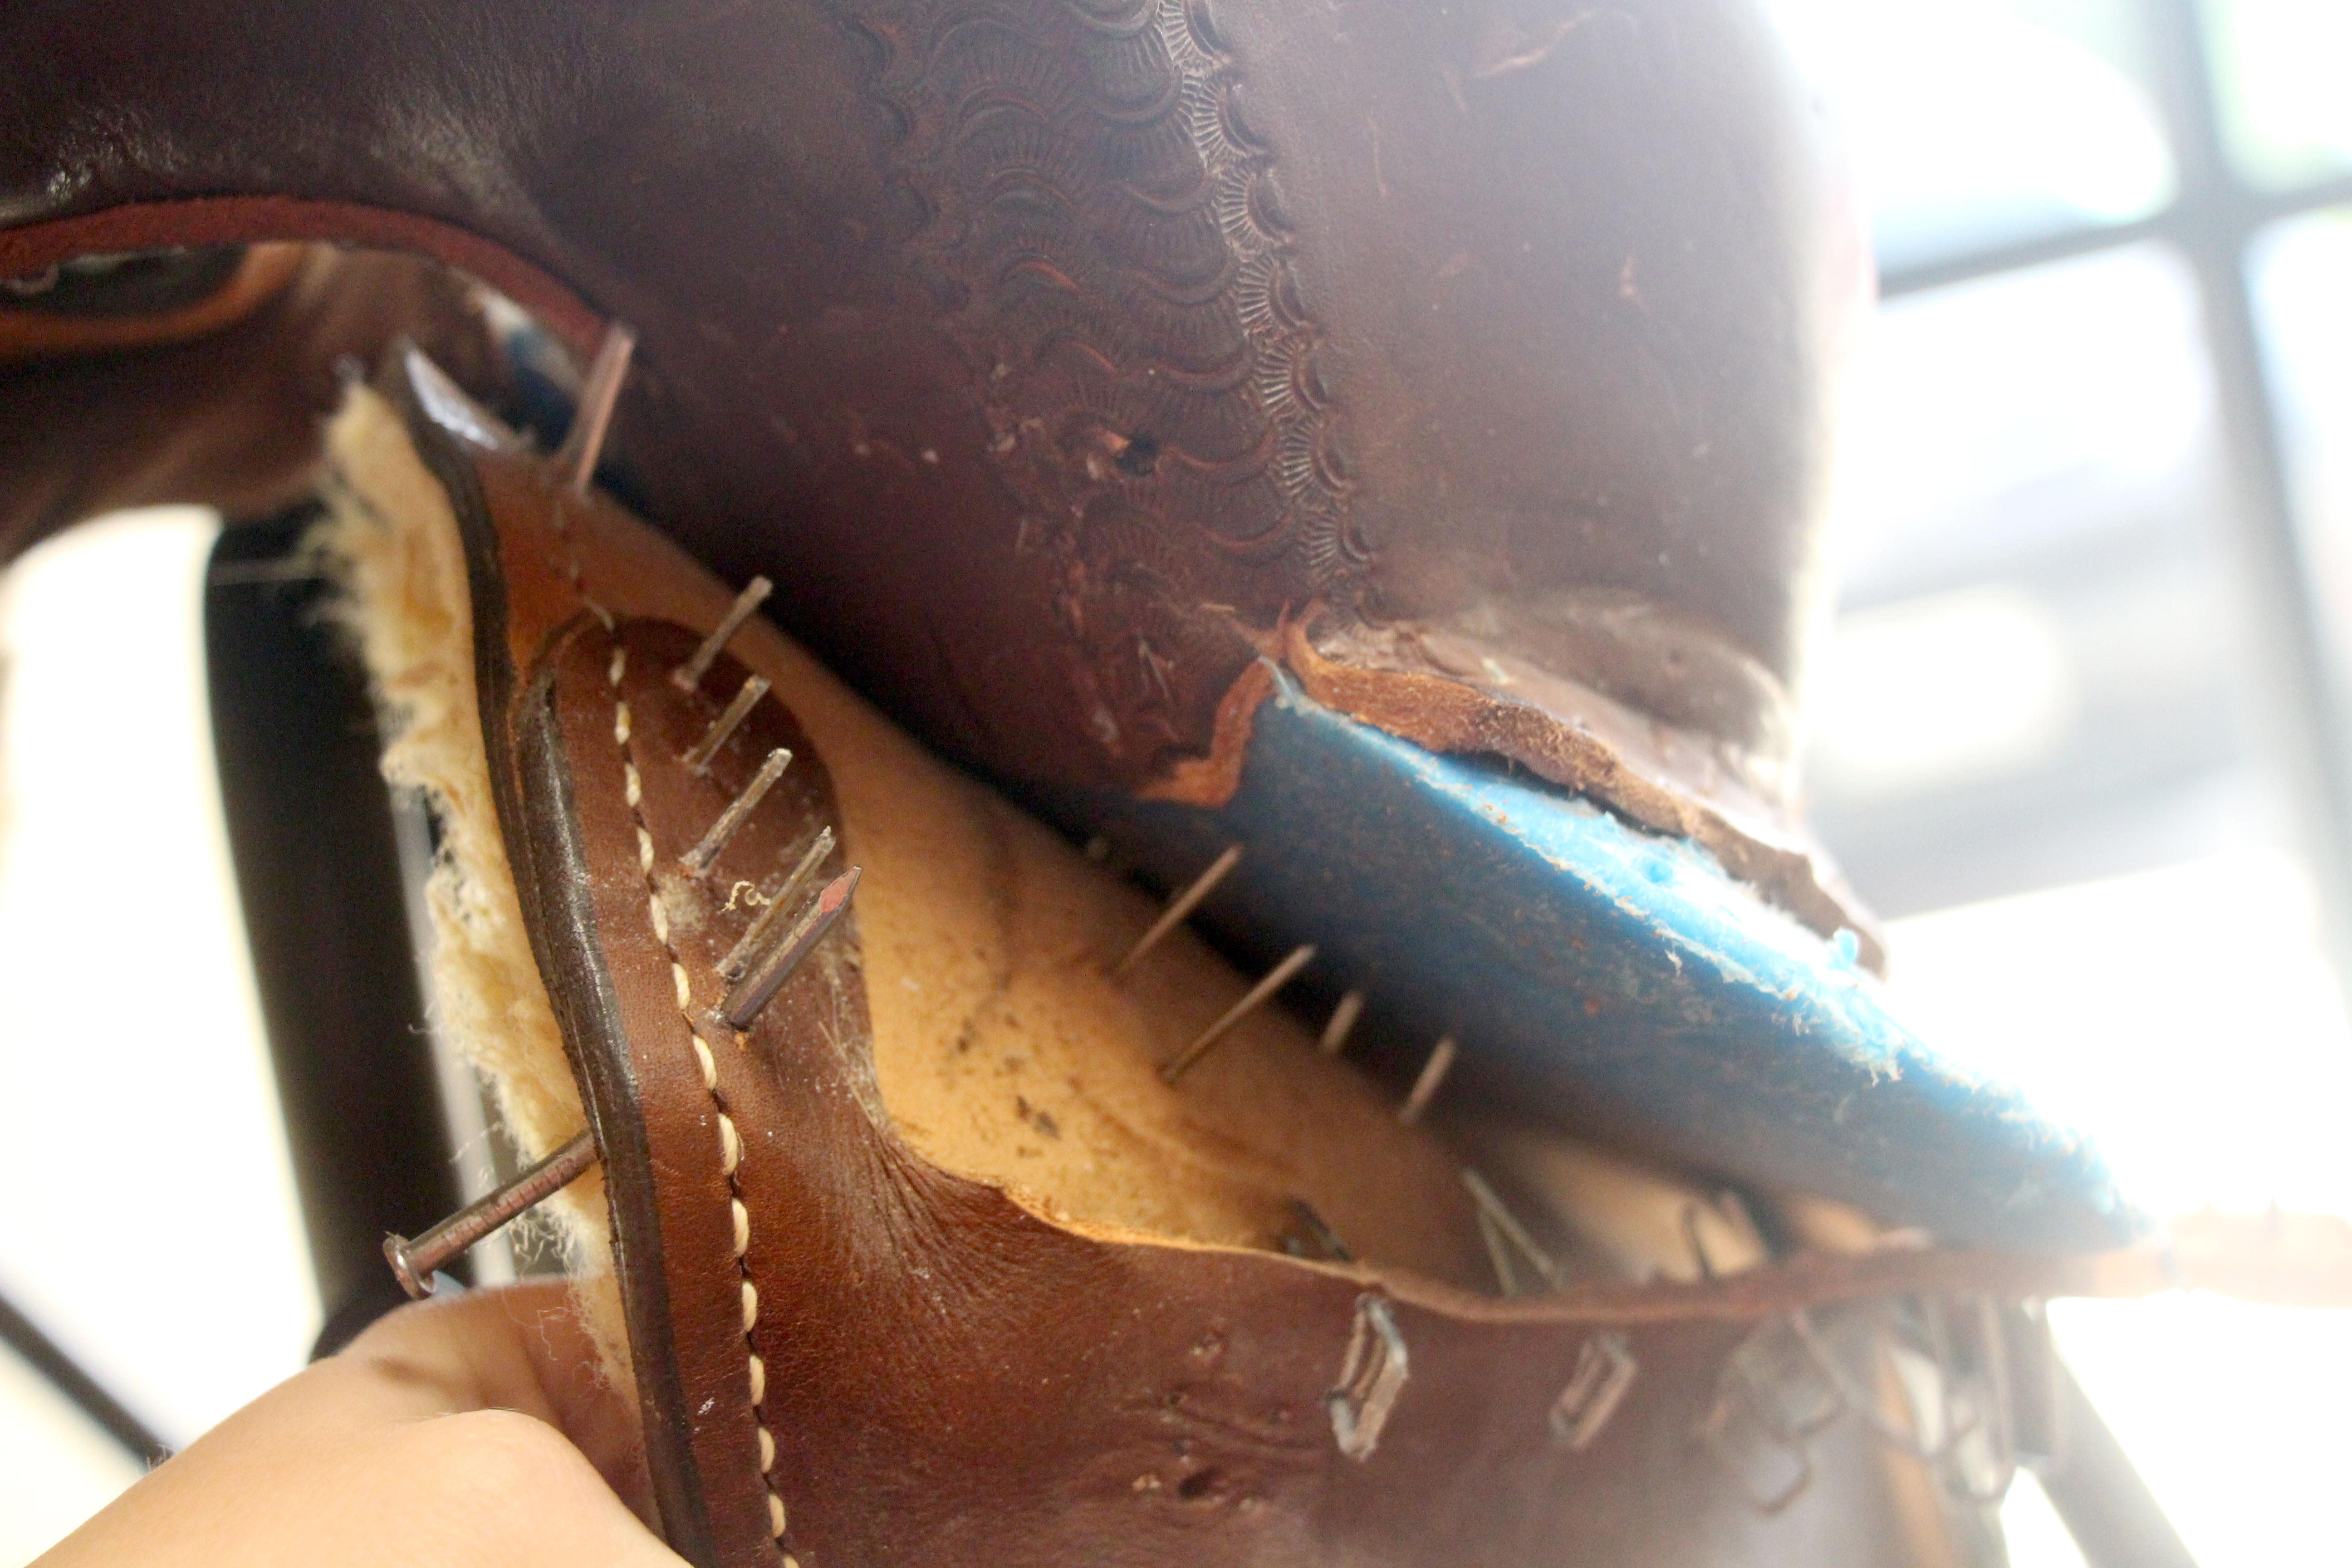
Staples in the wool. Also note the long nail by my hand.
For the same reason, a lot of staples are shot through the underside of the skirts. Normally, skirts are formed to the tree wet so they stay nice and horse-shaped on their own. These were installed dry as a time and cost saving measure. The leather is also a bit thin, so they may not be stiff enough to hold a good shape.
Staples.
So many staples… These things are a major pain. They have to be replaced with new staples, nails, or screws– they don’t go back in once they’re out.
At least the bottom layer is leather.
The skirts are on the flimsy side, with the two layers adding up to only a ¼”. There is a relief cut in the backing; again, this is to allow the skirts to be stapled in instead of formed. Otherwise, the compound curve would cause a bubble in the leather. Being an in-skirt rig, which depends on the integrity of the skirts, I don’t like the huge slice in it.
With the skirts off, we get a look at the bars. Not bad, nice and rounded. Sturdy at about 1″ full thickness. Built-in ground seat. Unlike the last “flex-tree” I saw, this one is only marginally flexible. I doubt it changes shape much during normal use, but it will bend instead of break when push comes to shove.
A plastic tree isn't necessarily bad, I just haven't personally seen one that wasn't...
This is in an Arizona bar style, were the stirrup groove is only on one side. The other fades smoothly into the rest of the bar. This is sometimes preferred by ropers for extra strength in this thinner bar area. The downside is that one edge of the stirrup leather can stick out from the surface. I see a little wear on that edge, but not an excessive amount.
The one groove itself, however, is a problem. It’s very abrupt and deep– almost twice the thickness of the stirrup leather. The angle is far forward– unless you ride around with your heels on the horse’s shoulders like a saddle bronc rider, the leathers won’t come close to them. This makes a cliff right behind the shoulder where the rigging cinches it down. It looks as though there’s a sort of raised pad shape, creating an even higher pressure area.
Note the raised "pad" area on the bar.
This high spot is easily felt by hand through the under skirt– as well as both edges of the stirrup leather. I should point out that the “pad” area is a normal aspect of a tree (known as the crown). It may be bigger or smaller depending on the build of the intended horse. In this case, it’s combining with the stirrup groove to create an issue.
Staples.
The marks left on the skirts help determine where the pressure points are. The thick edges of the gullet cover have left impressions on the skirts as well.
This saddle was primarily used on one horse– a horse that possibly could have used something wider in the front. However, even on a narrower horse, I feel that the stirrup grooves would still be a problem.
Imaged darkened to show the wear more clearly.
In this image it’s obvious that the highest pressure area is next to the stirrup groove. There’s also a significant amount of wear right on the edge of the gullet cover. Something not as noticeable is the lack of wear right behind the stirrup leathers (between the orange and yellow arrows). This indicates that the edge of the leathers actually lifts the saddle enough to form a bridge, where there is no pressure. This reduces the bearing area and increases the load everywhere else.
The situation that caused these wear patterns.
Since I used to ride this saddle, I’ve got a little more insight to share. The horses ridden in this saddle have had a prone to buck, especially into a lope (from the scapula rubbing) or moving downhill (gravity increases pressure on the front). I’ve also seen head throwing when mounting or dismounting (from shifting weight to the front), plus grouchiness about being brushed in the wither area (bruising). All are strong indicators of soreness, evidently brought on by the shoulders of this tree. At the time, I was not experienced enough to recognize them for what they were– signs of pain.
Recap
The good:
Lightweight
Relatively secure rigging
Real leather
The bad:
Multiple pressure points on horse
Leather sealed with varnish– does not accept oil
Uncomfortable for rider
So. Does it Pass the Checklist?
Is this thing going to stay attached to the horse if things get western?
Pass. It’s not going anywhere… for now.
Will it sore the horse?
Fail. The pressure behind the shoulders is considerable.
Will it sore the rider?
Fail. In my subjective opinion… it’s awful.
The Verdict: Fail
It’s a shame, too, because with some design changes it would be just fine. Not for anything heavy-duty, granted, but good enough for the trail.
Not all factory-made saddles have such serious issues. But it pays to be aware of the things that can go wrong when cost-saving comes before the consumer and their animals. These defects are usually not visible from the outside, and not easily accessible either.
Be sure to get recommendations from knowledgeable sources when looking for a saddle company or saddlemaker so you can buy with confidence. And don’t be afraid to closely inspect saddles you may already have– it’s better to find out there’s something amiss now than after an incident!